I’m always interested in trying out different things and I thought it was time I had a look at Hugo the open source static site generator. At the same time I was interested to learn about GitLab-CI and decided to combine both in a little mini project.
Hugo
Hugo is a framework for building static sites, it claims to be the world fastest and was something I came across whilst learning Go (Golang) last year. After following the Hugo Quick Start pages I had a small static web site up and running in no time at all. But I wanted a way of storing the content in version control and automated way of publishing the pages to my NGINX host.
Not sure how to use Hugo? Visit the excellent Hugo documentation and follow the Getting Started guide.
GitLab-CI
I’ve been using a GitLab free account for a while and until now hadn’t really had an opportunity to try out the CI/CD features provided. The plan was to use the CI features to build the static pages and then find some way of deploying from a successful build.
GitLab-CI is simple to setup, create a file called .gitlab-ci.yml in the root of your repository containing the build instructions.
|
1 2 3 4 5 6 7 8 9 10 11 12 13 |
stages: - build build: stage: build image: jojomi/hugo script: - git submodule update --init --recursive - hugo -d public_html artifacts: paths: - public_html only: - master |
Line 5: Use the jojomi/hugo docker image.
Line 7: Update the Hugo theme which was added as a git submodule.
Line 8: Run hugo telling it to put the generated content into public_html.
Lines 9, 10, 11: Define public_html as containing the build artifacts.
Lines 12, 13: Only run on the master branch.
With the .gitlab-ci.yml file in place in the repository I needed a gitlab runner to perform the build steps. For this I installed a local runner on my mac, registered the runner to my project (using Docker as the executor) and ran the pipeline. It works!
Deploy artifacts using SSH
I have a successful build job with build artifacts and I need to upload those artifacts to a web server. This involves adding a deploy stage to the .gitlab-ci.yml and adding variables for SSH to the runner configuration.
|
1 2 3 4 5 6 7 8 9 10 11 12 13 14 15 16 |
deploy: stage: deploy image: alpine:latest before_script: - apk update && apk add --no-cache openssh-client - eval $(ssh-agent -s) - mkdir -p ~/.ssh - chmod 700 ~/.ssh - echo "${SSH_PRIVATE_KEY}" > ~/.ssh/id_rsa - chmod 400 ~/.ssh/id_rsa - echo "${SSH_HOST_KEY}" > /etc/ssh/ssh_known_hosts script: - ssh-add ~/.ssh/id_rsa - scp -r public_html/* $SSH_USER@$SSH_HOST:/var/www/html/ only: - master |
Line 3: Use alpine:latest docker image.
Line 5: Use Alpine package manager to install the openssh-client.
Note: The ampersand is getting encoded you will need to change this if you copy and paste this line.
Line 6: We are going to use ssh-agent for handling SSH Keys.
Lines 7 – 10: Take the SSH_PRIVATE_KEY variable, output to file and set file permissions.
Line 11: A lot of example ignore the host key check but it’s not difficult to setup and should really be used. /etc/ssh/ssh_known_hosts is system-wide and used by all users.
Line 13: Add the SSH key to ssh-agent.
Line 14: Use SCP to copy the build artifacts to the web server host.
Line 16: Only work on the master branch.

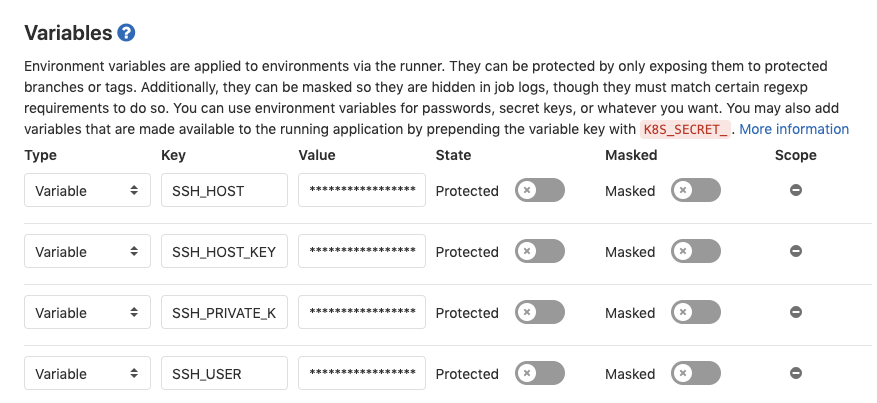
The variables in the file such as $SSH_USER are defined in the projects Settings, CI/CD page.

Today I learned
Now I have to be honest and not everything worked first time. I will outline some of the issues I came across and hope that these might help others who face the same issues.
|
1 2 3 4 5 6 7 8 9 10 11 12 13 14 15 16 17 18 19 20 21 22 23 24 |
Running with gitlab-runner 12.0.2 (d0b76032) on mango.wahooga.local 5uuZEpux Using Shell executor... Running on macosx.wahooga.com... Fetching changes with git depth set to 50... Reinitialized existing Git repository in /Users/davem/builds/5uuZEpux/0/wahooga/hugo-blog/.git/ Checking out 45060b71 as master... Removing public_html/ Skipping Git submodules setup Downloading artifacts for build (249828694)... Runtime platform arch=amd64 os=darwin pid=8401 revision=d0b76032 version=12.0.2 Downloading artifacts from coordinator... ok id=249828694 responseStatus=200 OK token=Wp3nd8Zx $ apk update && apk add openssh-client bash bash: line 82: apk: command not found $ eval $(ssh-agent -s) Agent pid 8418 $ mkdir -p ~/.ssh $ chmod 700 ~/.ssh $ echo "${SSH_PRIVATE_KEY}" > ~/.ssh/id_rsa.pub $ chmod 400 ~/.ssh/id_rsa.pub $ ssh-add ~/.ssh/id_rsa.pub Identity added: /Users/davem/.ssh/id_rsa.pub (davem@macosx.wahooga.com) $ echo "${SSH_HOST_KEY}" > ~/.ssh/known_hosts $ scp -rp public_html gitlab@178.122.164.146:/var/www/html |
apk: command not found
The deploy before_script would give me this error and I wasn’t sure why. It turns out I had registered my first runner with the shell executor when I needed the docker executor.
Job sits there stuck at the SCP command
Adding the -v parameter to SCP showed me that it was getting stuck with the host key so I confirmed this was the issue by using -o StrictHostKeyChecking=no -o UserKnownHostsFile=/dev/null parameters. Sure enough things started working so I changed the path in Line 11 from ~/.ssh/known_hosts to /etc/ssh/known_hosts.
hugo posts not showing when deployed
The new hugo posts I created were visible when running locally but the pages were missing when I deployed to my web server. This was a face palm moment as I hadn’t notice the content was set with draft: true. Obviously it would be useful to have drafts visible when previewing locally but you wouldn’t drafts to be published to production. Changing the content with draft set to false was an easy fix.
